After just finishing an article on the importance of image selection, I felt an article covering an essential method of making your images truly shine would be appropriate.
This article is all about sharpening your images, for whatever purpose (either printing or web view). I will describe some example values to use for different images, cover how to sharpen for specific sizes, how to avoid sharpening halos, how sharpening can be used for haze removal, and finally, how it can sometimes help save an out of focus image.
What is Sharpening? (And what is USM?)
Sharpening refers to an increase in the contrast of edge definitions. Increasing sharpness helps bring out fine detail and can increase local contrast. It is important to note that it does not work in the same way as general contrast or curves adjustment.
Simply, here's a quick example of an image before and after sharpening has been applied (I will get into the specifics of the values later):

We've now covered what sharpening is. So what is Unsharp Mask (USM)? At first glance at the name, it seems contradictory to our goal. But, as we learned in the tutorial on masking, a mask hides elements of a process done to an image. In this case, the mask is hiding the 'unsharp' elements. Essentially, USM creates a somewhat blurred copy of the image being sharpened, then subtracts that copy from the original. In doing so, the USM is able to detect any edges in the image and then increase the contrast along those edges. It sounds complicated, but fortunately, programs that utilize USM do all this work themselves. Your work lies in understanding what setting you can adjust in the USM tool, and how to apply different settings to different images.
Let's quickly go over some terms that are essential to understanding USM. Below is the window that will appear when you apply USM (the image in the window is mine - of course yours will be a crop of whatever image you are sharpening). You access this window in Photoshop through Filter > Sharpen > Unsharp Mask...
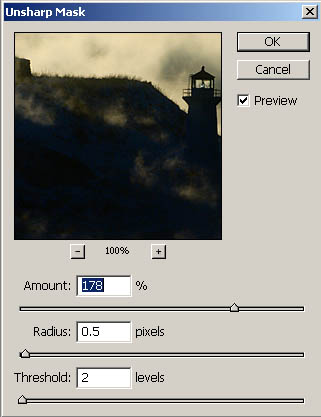
There are three important fields in this window. They are:
Amount: This is shown in percent and is the degree of sharpening applied (which is then qualified by the next two variables). Radius: This alters the edge size that is sharpened. A smaller radius alters smaller edges, and (hopefully obviously) a larger radius alters bigger edges. Threshold: This tells the USM filter how different two tonal values have to be before USM affects them. For example, sharpening a tree and sky shot - you would want the branches sharpened but not noise in the sky. Typically, values between 0 and 5 are all you'll need to use (higher value means a greater difference in tonal values will need to exist before USM will affect them).
Finally, there are a few important notes before we get into specific sharpening techniques.
If you are working with multiple layers, make sure you have the base layer selected. If you sharpen a non-image layer, sharpening will do nothing (though you can use USM on layer masks if they have a blurred edge). My preference is to duplicate the base layer, and apply USM to the new layer. That way I can alter the opacity, add a layer mask, or completely delete the sharpened layer later on. It is best to apply sharpening as the very last step. Changes such as resizing, adjusting contrast, and other steps can affect what degree of sharpening needs to be applied to the final image.
Values for Different Detail Types
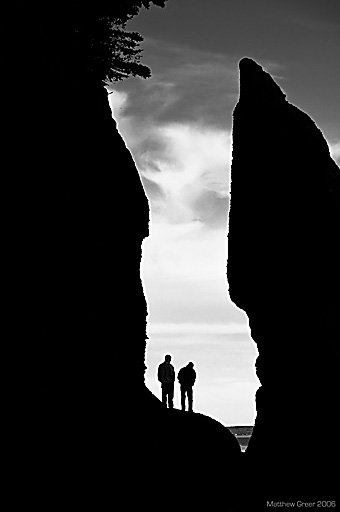
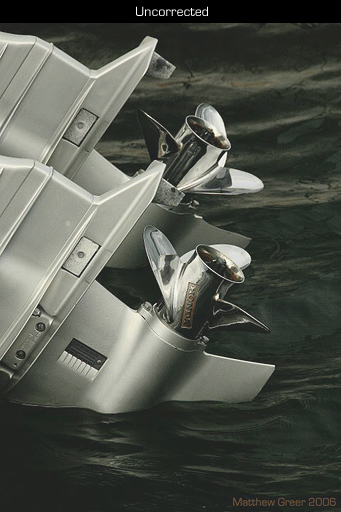
Here are a couple of examples of USM values to use for different detail types. Now, these images are quite small, and so I used values specific to their size. More on that in the next section.
Typically, fine detail requires a smaller radius with a greater amount, while coarse, blunt detail requires a larger radius with a lesser amount. When there is subtle detail in the image that you don't want sharpened (such as noise, skin texture, etc.), a greater threshold is required.
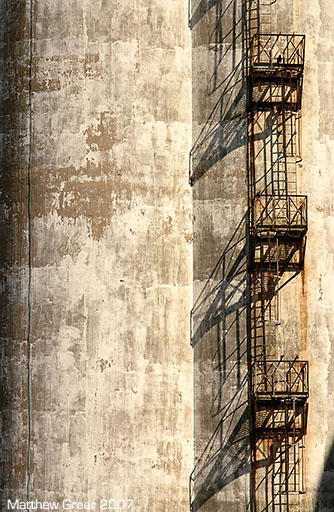
Here are a couple of examples.

Amount: 200
Radius: 0.3
Threshold: 4
Amount: 50
Radius: 0.6
Threshold: 2
In the first image, you can see that most of the detail is very fine, and there's a fair bit of blue sky. So for that image, I used a small radius and high amount. I also used a relatively high threshold to help avoid introducing noise into the sky (what little sky texture that exists is jpg compression).
In the second image, there is virtually no fine detail. There is texture in the concrete and there is a metal ladder. A larger radius and smaller amount were used to accent the blunt detail. A relatively small threshold was used as there was no fine detail that could have been over-enhanced.
Sharpening for Specific Sizes
Similar to using specific sharpening settings for different detail types, as we just covered, it is also important to use specific sharpening settings for different image sizes.
This can be thought of in a similar way to sharpening for different detail types. For instance, if you downsize an image for web viewing (between 500 and 800 pixels on the long edge), then most detail will be fairly fine on the screen. Conversely, if you upsize an image for printing (or even keep it at its native resolution), even fine detail will be fairly coarse compared to the web-sized image.
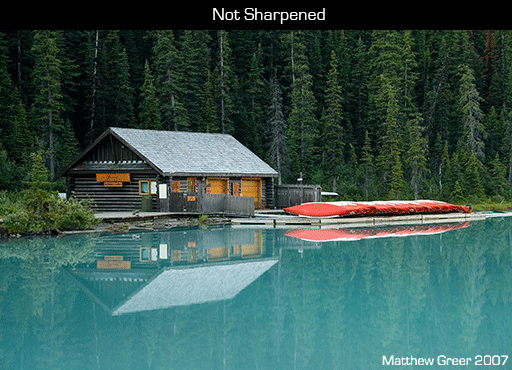
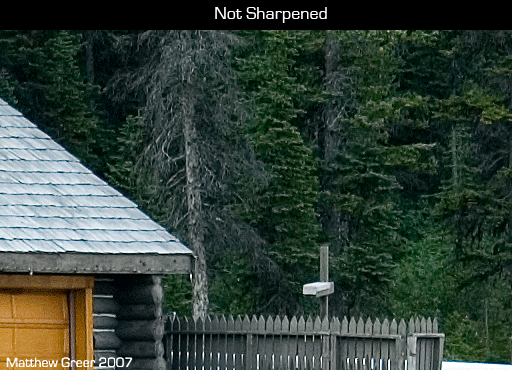
Let's take a look at the following example. Both images are from the same capture. The first is the entire image, downsized for web viewing. The second image is a crop from an image ready to be printed at 8"x10".
Amount: 200
Radius: 0.3
Threshold: 4
Amount: 140
Radius: 0.6
Threshold: 5
The first image has a high amount and a small radius, thus accenting the fine detail. The second image has a smaller amount and a larger radius, thus accenting the larger detail.
Avoiding Sharpening Halos
I don't know of any special tricks to eliminate sharpening halos, other than to be cautious not to over sharpen.
The best way to avoid halos is to do all of your sharpening while viewing the image at 100%. Now, not all images need to be sharpened to the max, but if you have an image you want very heavily sharpened, turn up the necessary values just until you start to see halos, then pull the sliders back down a bit. Scrutinize the image carefully, and you'll get better with time.
Below is an image with really bad halos, just so you can see what I'm talking about. The white edge between the black and grey is the halo.
Using USM to Remove Haze
Unsharp Mask can be used for more than just sharpening edges - it can also be used to reduce the appearance of haze.
When you stop and think about how amount and radius work together, you can probably figure out how this will work. You are wanting to add contrast to large areas, so a large radius will be necessary. Let's look at an example:
This image required a radius of 60, amount of 35, and I used a threshold of 4. The specific number that you will use will change with the image, but I've found that these are good general guidelines for haze removal.
Using USM to Refocus and Image
It should be noted that USM cannot actually make an out of focus (OOF)or blurry image perfect. It can, however, be used in rare cases to make an OOF or blurry image slightly more usable for small applications (4x6 prints or web images).
What is essentially needed is very strong sharpening - a combination of a relatively large radius (between 1.5 and 5, usually) along with relatively high amount (usually 100 or more).
One more note before I show an example - it is helpful to use layer masks when you use this technique, as you will not want to "re-focus" the truly OOF elements of the image.
Now, on to the example.

"Heavy USM" in this case was Amount = 100; Radius = 4.5; Threshold = 5
As you can see in this example, the original image is out of focus (I am referring only to the portions that are meant to be in focus). The next image was given approximately the same USM treatment as any other image I would downsize for web viewing. The third image has USM settings of amount = 110, radius - 4.5, threshold = 5.
The fourth image has a layer mask applied to it, masking the "re-focusing" from the elements meant to be OOF.
While this is certainly not a perfect image, it does make it slightly more usable. I have been able to use this process to change a friend's OOF 8 MP image into a usable 4x6 print.
I hope you have found this tutorial helpful. If you have any questions or comments, I'd love to hear from you.
Thanks,
Matt
5 comments:
i've been following a slightly different approach. Highpass applied on a duplicate level with the required amount of radius accentuates the edges. Change the blending mode of the highpass layer to overlay sharpens the image. I usually reduce the noise of the image if required, prior to applying highpass.
I found your website by way of a link in Photojojo. Excellent job on the tutorials!! Very concise and easy to understand. I use links to your blog to post in my photography forum to help beginners and advanced photographers alike! Thanks so much for taking the time to share your expertise with others!
I came to your site from Google, searching for DIY photography. Thank God I found you. I have greatly enjoyed going through the very well written tutorials and in the last two days learned more than I have in a long time. I will surely keep coming back for more. This is a veritable treasure!
YES! I get it! Matt, you are the man. Thank you SO much!
I'm going to go make a you a Flickr contact. BTW, on Flickr I'm Captpiper.
I agree with Karen, your articles are excellent and straight to the point. I refer many of my friends to your blog. Thanks!
Post a Comment