The following tutorial is a relatively quick and simple how-to for photographing 2-D artwork such as paintings, textiles, glass-covered images, reproducing newsprint, and more. I will also cover how to correct and post process the photographed artwork.
I have found the easiest and most controllable way to photograph artwork is to use strobes or off-camera flash. If you are unfamiliar with off-camera lighting in general, I highly recommend you spend (a lot) of time reading and exploring www.strobist.com.
Let's go over some basic gear needed to shoot artwork:
A good lens, with no distortion or vignetting (see lens reviews at Photozone). Macro lenses are an obvious choice. Strobes or off-camera flashes, preferable with a PC-Synch port. Flash transmitters or receivers such as optical slaves, Cactus V2s, Pocket Wizards, or Nikon's CLS system. You can also use flash cords. Light stands that can go to the full height of the work you are photographing. Tripod to keep your camera steady, and to help keep the camera square to the artwork. Grey card (not essential, but will simplify the entire process). Camera! (Digital is preferred, so you can preview your work.)
For photographing wall-hung artwork, I have found that using two flashes, each on a lightstand and each reflected into an umbrella, the best setup. One light goes on each side of the artwork, at the same height as the artwork and at 45° to the artwork. Below is a setup image of a hooked rug I photographed recently. I've increased the contrast so you can more easily see how the light is falling on the art.
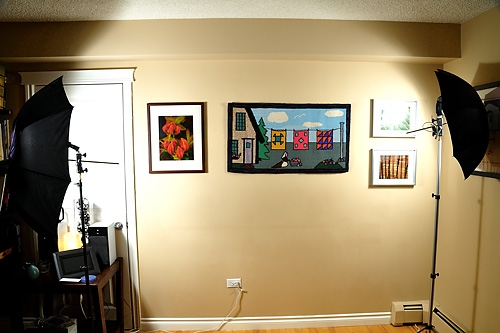
As you can see, the light is falling evenly on the hooked rug in the image as the overlapping fading lights balance out. Closer to the lights, however, the light falling on the wall is too strong, and if the artwork was within that range, it would result in bright spots at the edges.
How to set up your lights and your camera:
Set your camera's ISO to its lowest native setting (this will ensure optimal image quality). Set your camera's highest synchable shutter speed (you'll want to eliminate as much ambient light as possible). Set your camera's white balance manually (see paragraph below), or to cloudy, as that generally creates pleasing colours with flash. Set your aperture to between f/5.6 and f/11 - you'll want good depth of field and sharpness, but have some flexibility for controlling the light getting to the sensor. Set all your flash triggers so they are all on the same channel. Start with your flashes at 1/2 power. Do some test shots, watch your camera's LCD and histogram, and vary your flash power and aperture to get the light level right. Try not to bring your flash power up to full (1/1) power, as this will eat through batteries faster, and cause slower recycling times. Point your flashes into their respective umbrellas, and then the umbrellas at 45° angles toward the artwork. Start with the lights approximately 1 metre (3.23 feet) out from the wall, and 1 metre to each side of the artwork. Shift them around as needed.
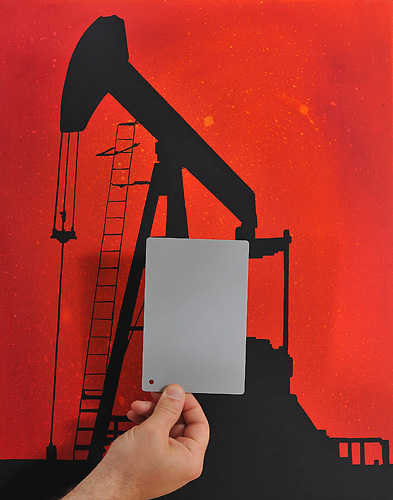
Once the lighting has been set up, the next step (not entirely necessary, but this will make post processing far easier) is to take a white balance reading from a grey card. The easiest way is to take a manual white balance reading with your camera (check your manual for specific directions) while using the same lighting setup you'll use for photographing. Your other option is to shoot RAW, just photograph a grey card under the light being used, and use the grey card to set the white balance in post processing, with a program like Adobe Camera Raw (ACR). I personally find the first to be much easier.
Of the above-mentioned forms of artwork, I've found paintings to be the most difficult - oil on canvas in particular. That is because the reflective properties of the oil paint combined with the minute 3-D texture of the canvas make eliminating reflections very difficult. There is much you can do in post processing to tone down or eliminate these mini reflections or bright spots, but if you can get the shot right at the outset, your processes will be much faster and easier.
The image below is of a painting by Edmonton, Alberta painter Melissa Ryan that I photographed (for reproduction purposes) last week.
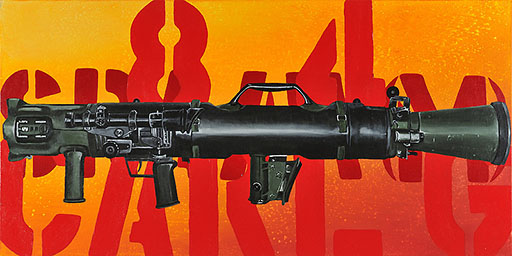
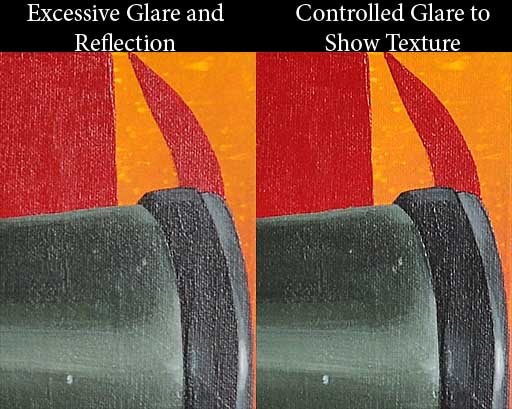
This particular piece was difficult because of the size (over a metre [3.28 feet] wide). While I was comfortable with small amounts of glare on the painting (small amounts would be just enough to show the texture of the canvas and the oil paint, but excessive glare would destroy detail and change the brightness of the painting to something the painter had not intended), my initial shots showed too much glare, especially near the edges. Below is an example of the initial poor shot (left), and the shot with the corrected lighting (right).
Much of getting lighting correct is trial-and-error (always double check your images on your camera's LCD), but there are some general rules that can be followed to avoid or easily correct your mistakes.
In the initial setup shot, the lights were at 45° angles to the artwork. Theoretically, this should mean that the light would leave the artwork also at 45°. The issue is that when reflecting light into an umbrella, the light ends up striking the subject at multiple angles. In this case, that's everything from about 10° to about 80°. This means that some light ends up reflecting straight back into the camera lens, showing up as a reflection on the painting.
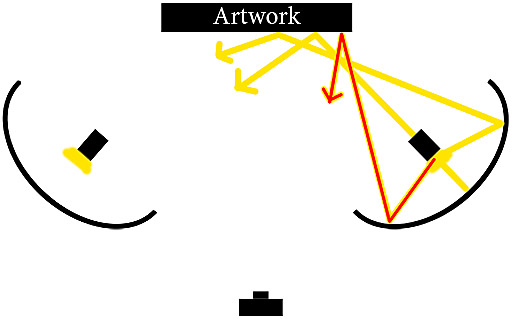
As you can see in the sketch above, the stream of light drawn in red is streaming back toward the camera, and would show up as a bright reflection. To remedy this issue (if it occurs), reduce the angle between the light source and the wall (move the flash and umbrella closer to the wall) and keep the light source pointing straight at the artwork.
Textiles and glassed-in images follow the same rules, but I've found them to be easier to photograph than oil paintings. With glassed-in images, you'll really want to make sure your shutter speed is as high as possible, as this will help eliminate any background reflections on the glass (including your own reflection). With this said, radio triggers are best for glassed-in work (such as Pocket Wizards or Cactus V2s), because you won't be using your on-camera flash to trigger the strobes, so there will be no light source on your camera that can reflect in the glass.
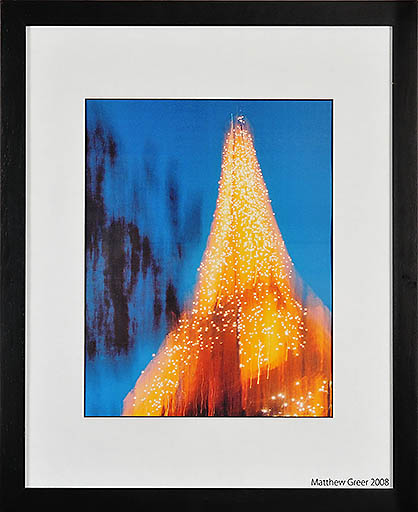
This is a glassed-in photograph of the Eiffel Tower. Note that there is no glare or reflection in the glass.
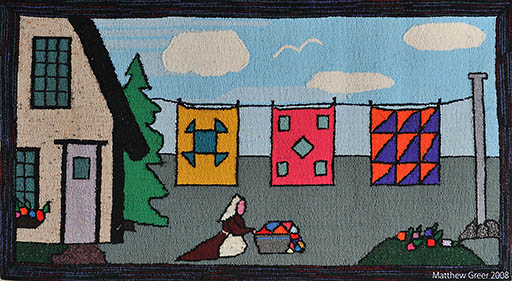
This is a hooked rug, hooked with cotton and wool fibres. Glare and reflection aren't a significant issue with these materials, but even lighting is essential.
This is a glassed-in photograph of the Eiffel Tower. Note that there is no glare or reflection in the glass.
This is a hooked rug, hooked with cotton and wool fibres. Glare and reflection aren't a significant issue with these materials, but even lighting is essential.
Photographing Newsprint and Other Small Artwork
For newsprint and other small, 2-dimensional artwork, a one-flash, one-umbrella setup works quickly and easily. Below is the setup, and shooting can easily be done with the artwork flat on the floor and shooting straight down on it.
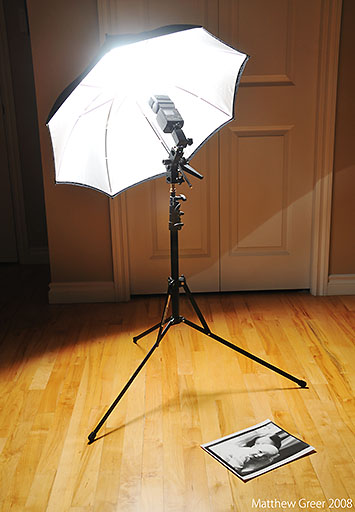
As you can see, the light is very close to the artwork (in this case, a black and white 8x10 print on matte paper). There is just enough space for me to shoot down on the work without the umbrella getting in the way of the shot. There is no reflection and the light is even. Below is the resulting image.
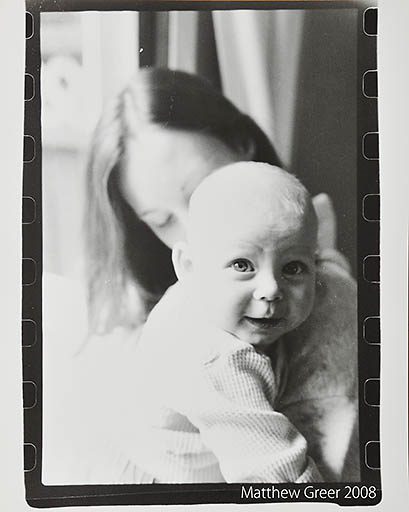
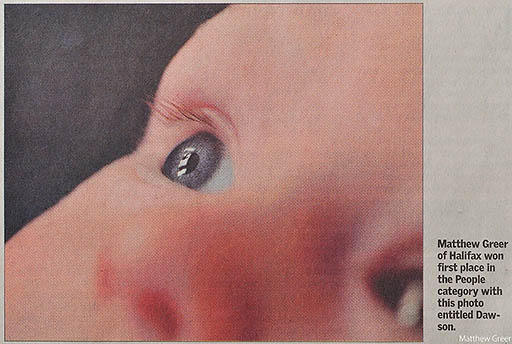
And now below, is an image of a newspaper printed photo (of an image that I won a newspaper-based photo contest with).
Post Processing Artwork
Finally, we'll cover post processing artwork. There are a number of issues that have to be considered when professionally photographing artwork. First of all is perspective. When shooting artwork, every effort should be made to photograph the image perfectly square. It is not always possible to get it perfect, and with Photoshop, it is quite easy to correct perspective. I have already written an article on correcting perspective, covered here.
Another aspect you'll want to control is sharpening. Again, I've covered that in a previous article, here.
Finally, an issue we discussed earlier in the article is even lighting across the image. Every effort should be made to get this perfect while shooting, but not all lighting variations can be seen on a camera's LCD. If, after shooting artwork, you find that one side or corner of an image is lighter than it should be, it can be easily corrected in Photoshop.
With the image open in Photoshop, create a new layer (Layer > New > Layer... or Shift+Ctrl+N). Change the Layer Blending Options (drop-down menu in the layers tab, Window > Layers or F7) to Soft Light. Select the Brush Tool (B), choose a brush size that will be approximately half of the area you want to darken (use the [ and ] keys), and soften the brush edge all the way (use the Shift+[ keys). Set the brush opacity to around 15% (simply pressing 1 + 5 on the top row of the keyboard will do this). A lower opacity and you won't see much change; a higher opacity and it will be difficult to blend the brightnesses together. Paint the lighter area, one stroke at a time. If you need the area darker, click and paint again. If you need it lighter, Ctrl+Z to undo the change, reduce the opacity, and paint again.
If you have any questions or comments about this post, please Email me.
Finally, a thanks to Melissa Ryan and her beautiful paintings, and Brian Larter for getting us in touch with each other.
Matt
28 comments:
I've done a lot of artwork photography, and I think you did a great job with this post. I worked at a gallery for 5 years and photographed thousands of pieces to put on the company website, everything from photos under glass, to metal sculpture, to oil paintings encased in 3" of clear resin.
One paradigm shift that I remember having, when working with highly reflective pieces, was that rather than thinking of it as trying to eliminate reflections, it sometimes helps to think of it as making the reflections a solid color, so they won't be noticeable as objects. For instance, if you angle a piece under glass towards a solid white wall (or sheet of foamcore, etc), there will still be a reflection - but what you'll be seeing is solid white, so nobody will *know* it's a reflection. It just looks like a highlight.
Dave Wright
San Francisco Photo
Matt,
I'm from Galveston and working with Operation Photo Rescue
www.operationphotorescue.org/
We help people restore their flood damaged photos.
I'm in charge of writing the FAQ for photographers on how to set up a "copy stand" to take a "picture of a picture" which is the first step in the flooded photo restoration process.
Do I have your permission to post a copy of your instructions on how to shoot artwork?
Hi Jim.
If the post can help in any way, please do use it. My preference would be for a link to my blog, or at least if you repost the information, to then link to my blog.
Thank you, and good luck.
Matt
matt - i'm very impressed that you are so open about sharing your secrets. i know it's a big deal to do that - so nice work. and great post!
Sincere Congratulations! You make us all proud; well done.
Hi, i've been asked to photograph some artwork and looked everywhere for help but could not find any. Thank you so much for this article! I'll be doing a test run of various items on the weekend as the actual shoot is in 3 weeks.
Thanks so much for this. Bang on the nose. Clear and simple on how to handle a very difficult issue.
Matt, thank you so much for this information.
I tried your techniques on an oil and canvas that I own -- and the picture came out great!
Again, thanks for sharing!
I need to start by saying thank you for sharing this info. I was just contacted today to shoot several paintings, I have all the gear I need and now the info. What I need help with is how to price it out.
Thanks again.
Thanks Dave, I'm getting into photographing artwork and your info. was great, very useful indeed.
Nice explanation and website.
Tomorrow I take pictures of paintings my dad (86 years old - young) has been working on for fifty five years and they are the same paintings. I will use your good advice.
Tom Ashland, Oregon
tomfrantzashland@gmail.com
I'm ignorant of photography but realize I've got to start recording my drawings. Thanks for you generous introduction.
I'm ignorant of photography but realize I've got to start recording my drawings. Thanks for you generous introduction.
Hi Matt
Great website on photograph of paintings you have, and thanks for sharing your secrets and information.
One question I have though, do you recommend Umbrellas with a White or Silver reflection coating on the inside.
Hope to hear from you soonest
Regards
Robbie Frey
South Africa
nice one there, what trigger do you use for it?
I am volunteering at an art gallery whereas the work is by physically/mentally challenged adults. I was asked to take photographs of the artwork for archiving and also to sell online. At first, I tried to eliminate light from windows and such, but then realized that if I added more light, it helped eliminate reflections. I still needed something else to help make these pictures good though. I really think I found it here! Thank you so much for your help and tutorials!
thanks Matt, it's a good article, u explained it very detail..
Dear matt,
Thank you very much for sharing your knowledge and expertise. I am a beginner photographer and your article comes very handy. I was trying to photograph painting of acrylic on canvas and couldn't get reed of glare. Now, after I read your article, I accomplished the project..
Thank you for being so open.
Great article. Thanks!
Great tips -- thanks a lot!
One question: do you ever use a polarizer to keep reflections under control? I could imagine that with, say, some thick oil paints, there'd be a lot of specular highlights no matter where you place the umbrellas. I would think a polarizer would help deal with these. But perhaps on a practical level it's not necessary, or introduces some other distortions which are worse?
Hello Hankk.
A polarized filter certainly would help cut down, or eliminate, reflections. That would be a matter of taste, I believe. Sometimes seeing small highlights accentuates the texture, and thus the three-dimensionality, of the work. Sometimes that would help the image, and sometimes it would detract from it.
Matt
Thanks, great tute, simple, concise and informative. What is your opinion on using a polarizer to reduce reflections/glare and enhance color?
thanks heaps for sharing the information matt.
i have my lighting equipment on the way and am ready for my first art gallery exhibition in the coming months.
Response to Dave:
Polarized light is light where all the wavelengths are in sync. Most light is not polarized, but we have artificial polarizers and nature has some natural polarizers in the atmosphere. When you turn the polarizer filter on your camera and you see the sky get darker -- the filter is rejecting the polarized light at one setting, and allowing it to pass through in the opposite setting. By the way, this effect is greatest when the sun is low in the sky -- at noon the light scatters so much that it loses polarization.
The polarizer does not change colors. It might seem to have that effect outdoors, but the polarizer is rejecting those parts of the spectrum that most polarized. If your light source is not polarized it will have no effect.
Your indoor light source for photographing art (incandescent or strobe) won't normally be polarized, so your filter will serve as a lens protector and not much else.
Postscript to my previous comment:
If your light is sharply angled on the subject you might indeed get polarized reflections. But I would rather shift the lights, or use a diffuser, reflector, or scrim, than use a filter.
Art photography is all about preserving information. Somehow that strikes me as the opposite of filtering information.
I thought it strange that there was no instruction or discussion of keeping everything 'square.' That is, the position of the camera lens must be lined up in the center of the painting (I photographed 100 paintings that had been in storage for 43 years after cleaning them - that is another subject.) A quick fix is to measure up to the center of the painting - not a trivial step from the floor and to the center of the lens (easy). They must both be exactly the same. And then the lens must also be exactly the same distance from the two sides of the painting. Measure with a tape from the center edge of the painting on each side to the center of the lens. These must be exactly the same. Once this is done the lens will be lined up with the center of the painting. Make sure, of course that the painting is not leaning back or forward. I use an artist's easel to hold the painting. Once this is set up and you can set the painting centers at the same place, the camera can remain on the tripod in the same position. Make allowances for different sizes by having the camera far enough away to accomodate them. Check your image by getting it on screen or printing it and measure the edges. If you are off a bit it will be apparent right away. Correcting for perspective is possible but quality and accuracy is lost.
Natural diffused light would be better than the flash, but requires a real studio with North light. I saw unevenness in the enhanced contrast of the flash. The center of the painting, or rug,in the photo is not receiving even light.
Lining up the camera with the painting takes time so marking the floor and wall or easel may make it easier when you have to do it again.
Hi Matt, thanks so much for this wonderful how-to. I recently did my first shoot of artwork with a 17-55mm lens and had some bending and distortion of the frames. Would you keep the lens at around 35mm? Does this seem like an ok lens to work with?
Thank you for this clear and really helpful tutorial! :-)
Post a Comment